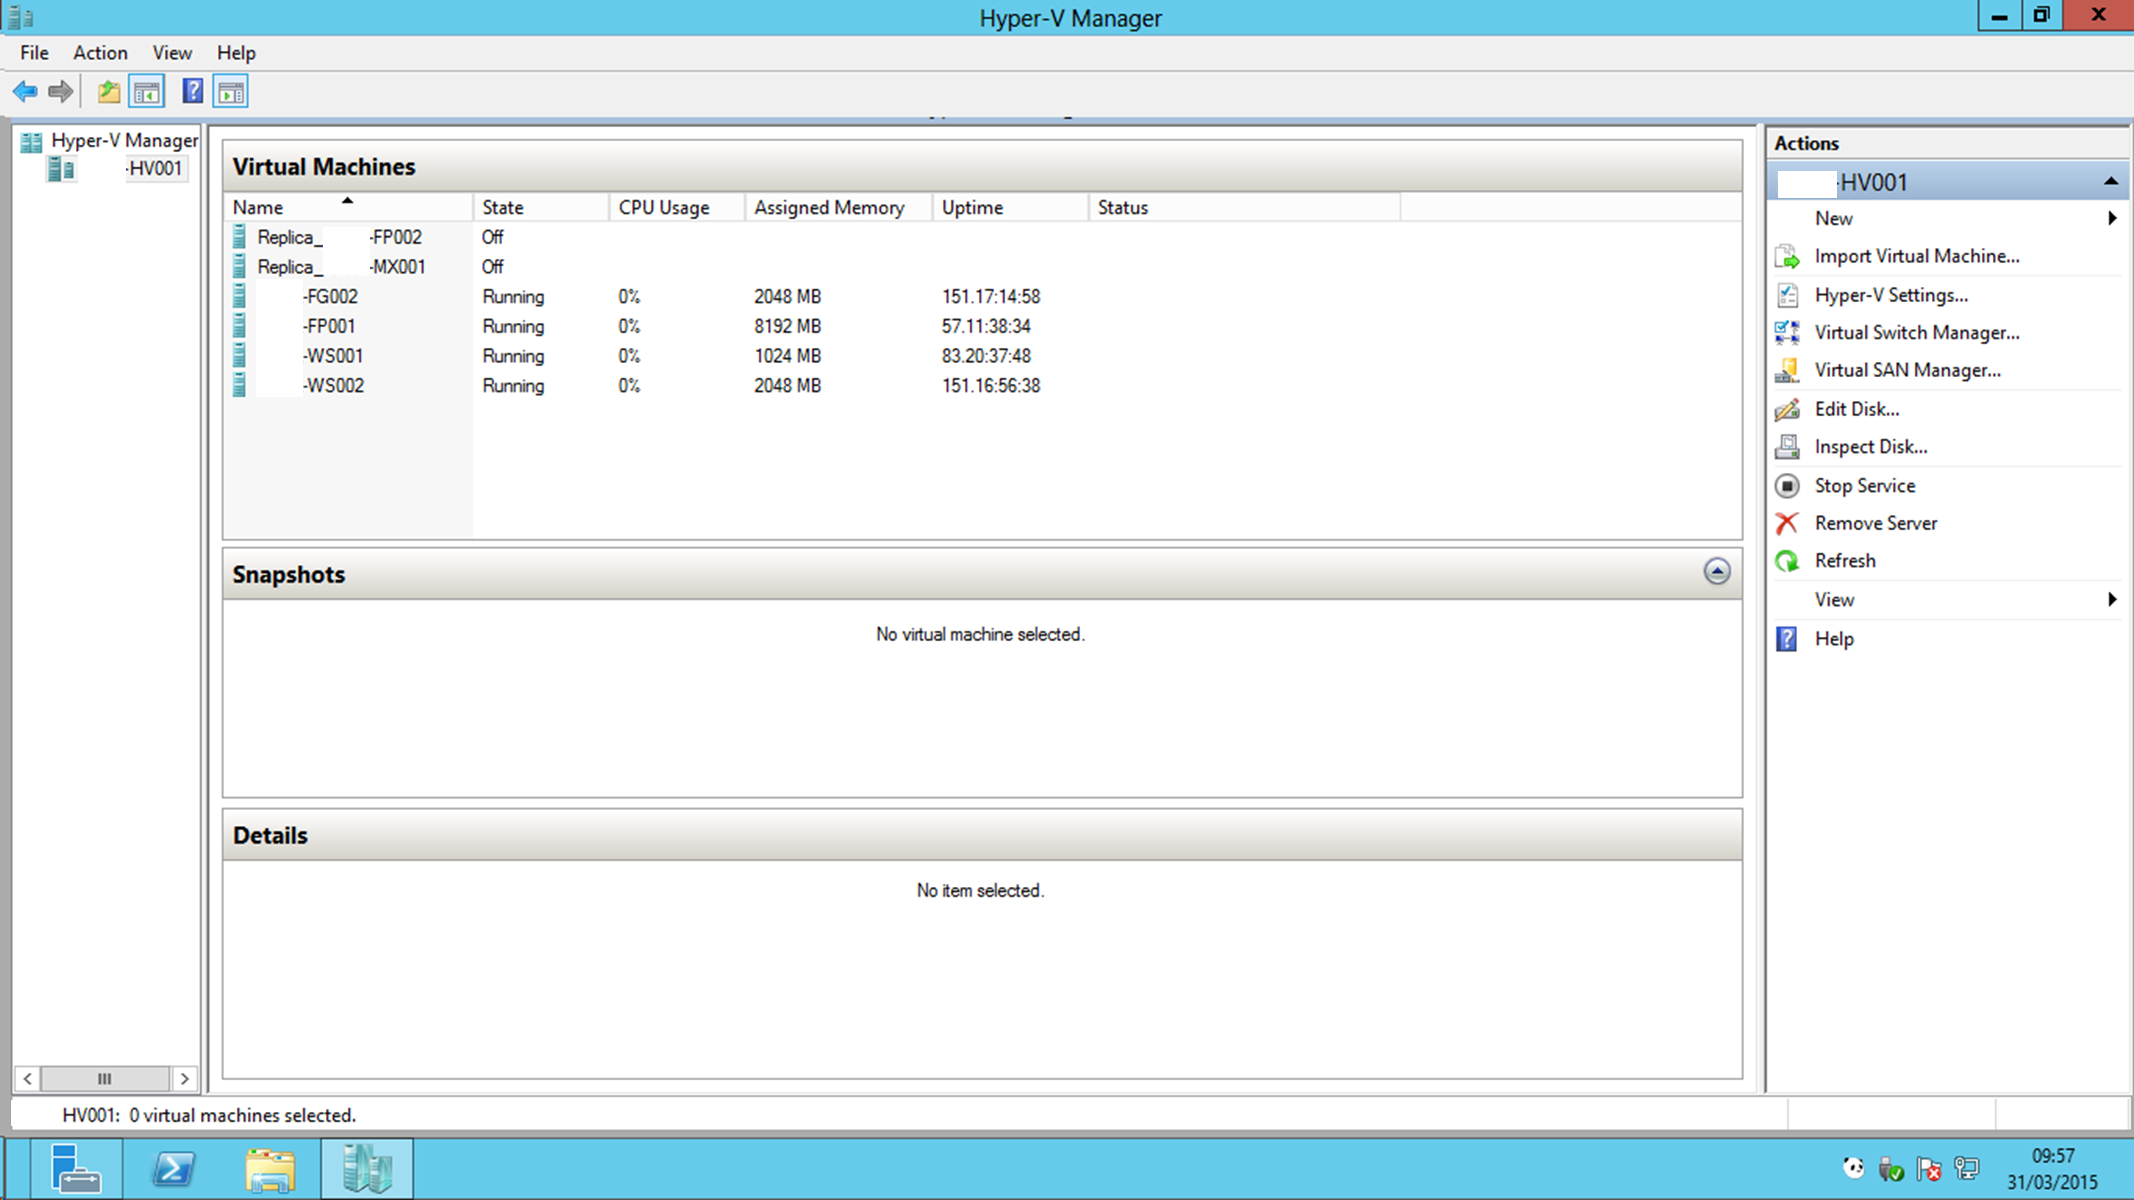
To start off our Hyper(-V) Minecraft server, we will need to set up a virtual machine with Hyper-V manager before hand. It is assumed that you already have Hyper-V set up on your server or local computer. Once you have done this, and have opened up the Hyper-V manager, you can continue with these instructions.
Note: Depending on how fast your Internet connection is, you may want to start downloading the Ubuntu Server ISO file now, so that it is ready for future steps. It’s up to you if you want the Long Term Support or latest release versions. I’ve chosen the LTS one.
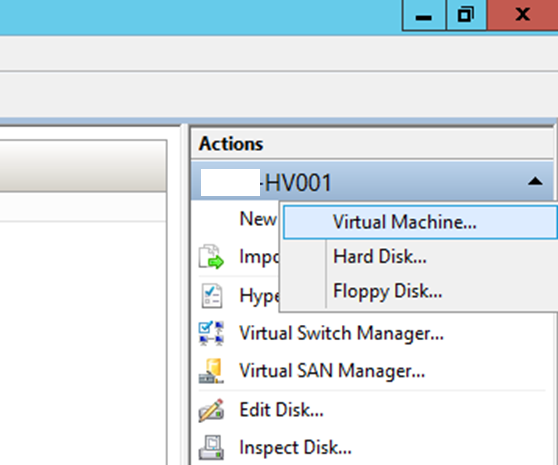
From the right hand side of the window, click on New > Virtual Machine to open the wizard.
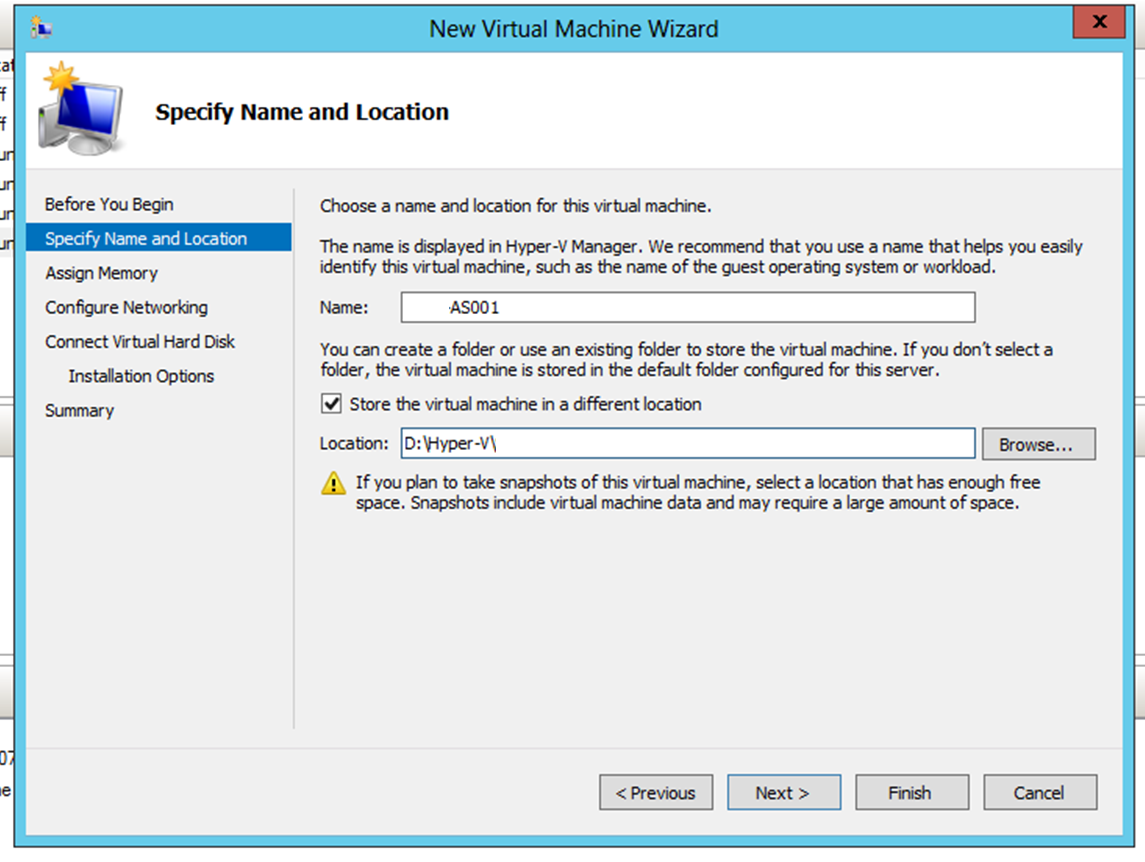
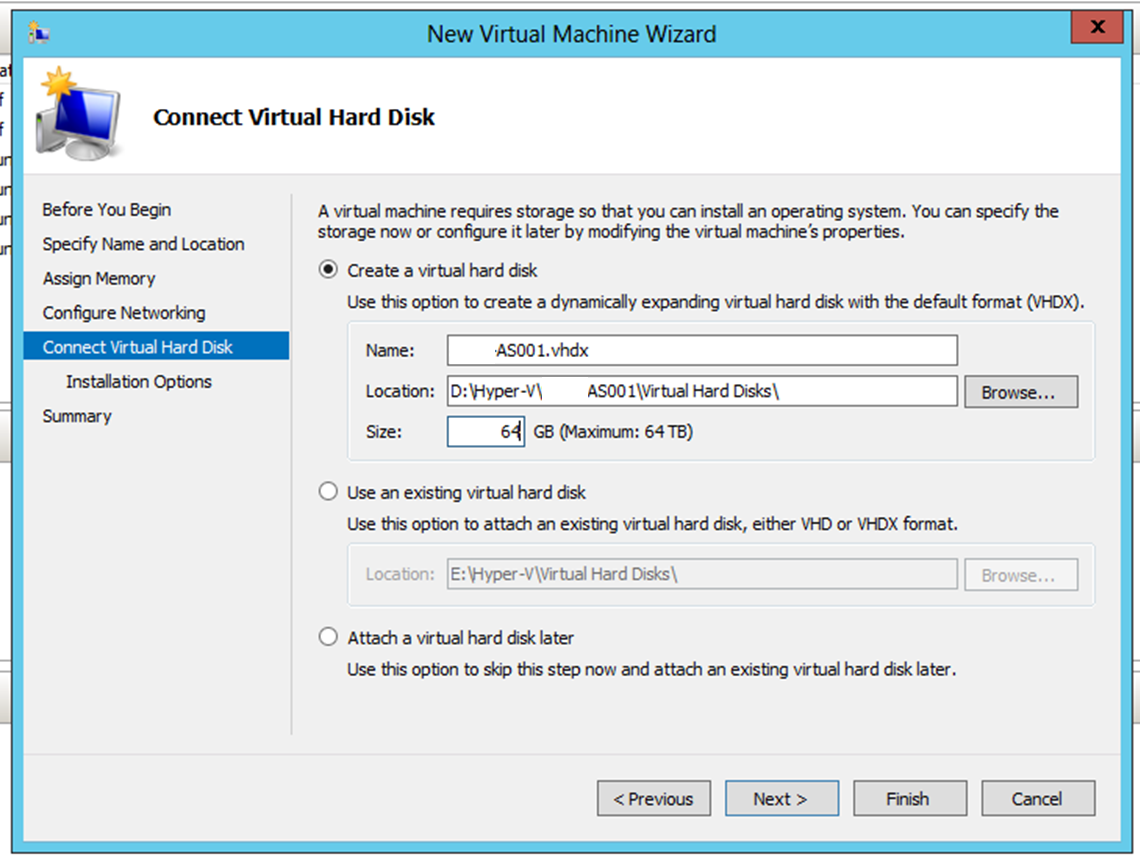
On the first screen of the wizard, give the machine a name. Following the naming convention that you use on your network. If you don’t have one, make up a relevant name. For me, I’ll be using AS001 for “App Server 001“. You will also need to choose where you want the virtual hard drives and other settings related to it to be located on the physical machine too. Once you are happy, press next.
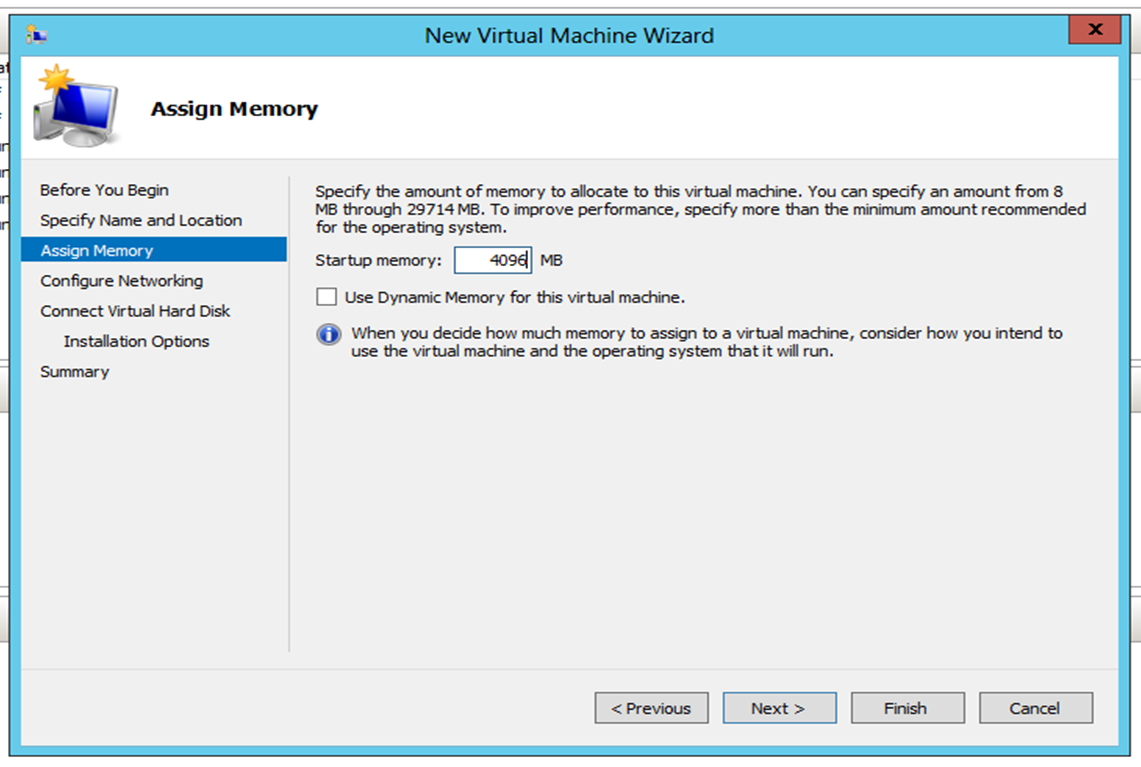
Choosing the amount of RAM for your virtual machine is a critical step. Choose too little and it won’t run smoothly, too much and your host machine will be crippled. The minimum recommended RAM for Ubuntu server is 192MiB, and for the CraftBukkit server, a minimum of 1GB is recommended. Also, for every 10 players, at least 1GB is recommended. Therefore, I have chosen 4GB as the RAM for my virtual machine, as this will support up to 30 players, plus overheads for the operating system, and with room for any unexpected memory increases. Don’t worry about ticking dynamic memory, as we won’t be needing it. Press next when ready.
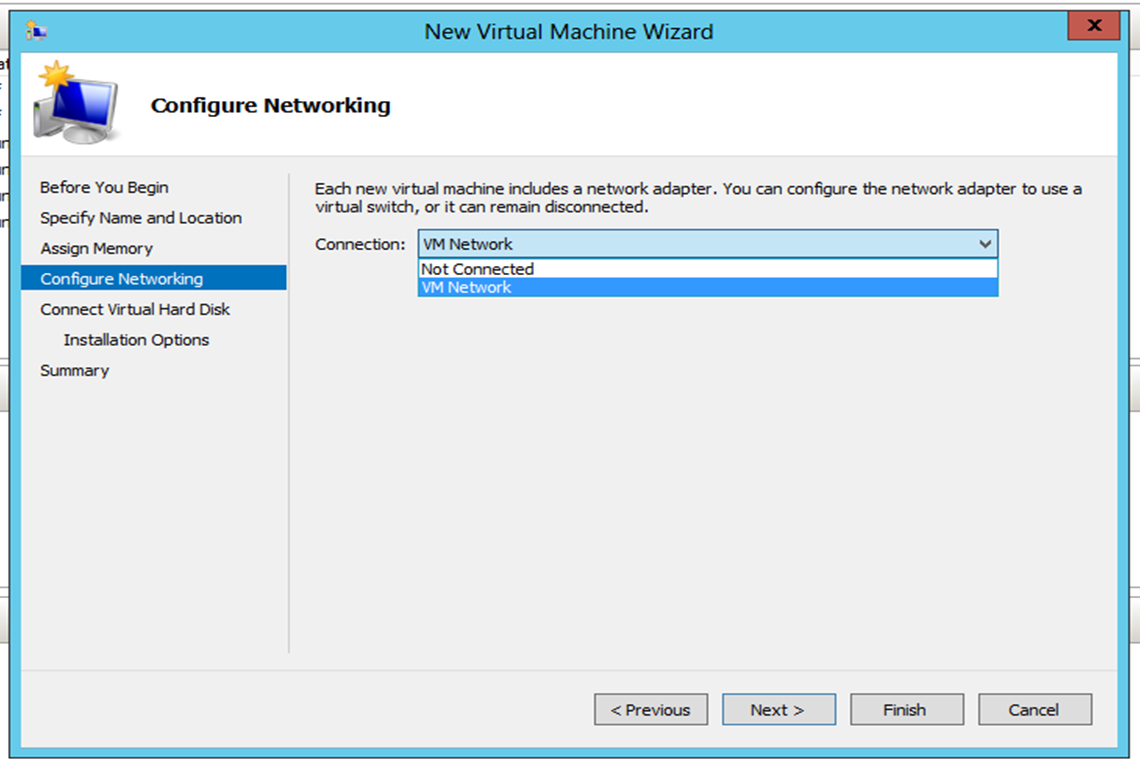
Choose a network depending on what is available, and what you have set up from when you installed Hyper-V. I only have one network, you may have others depending on your setup. Once you have made the choice, press next.
Leave the locations of the disks as what it gives you, as this is the location that you selected in the first step. Select 64GB as the size of the hard drive, which is more than enough, for the server. Press next when ready.
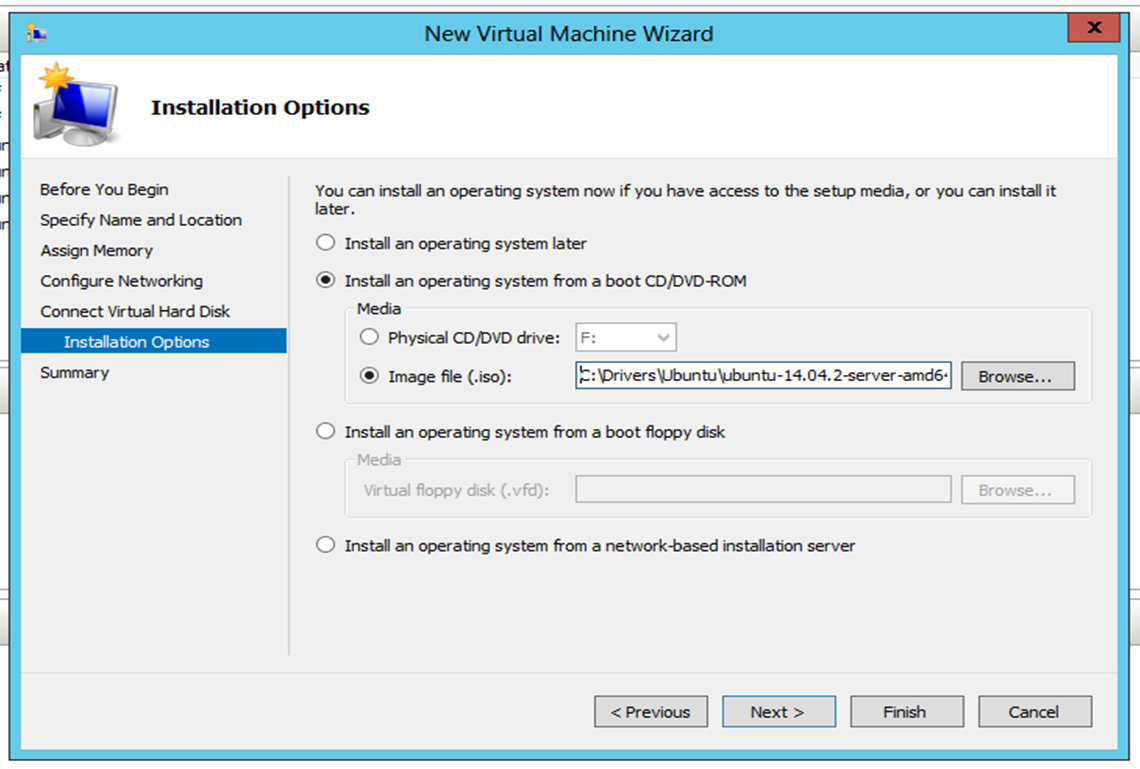
Download the Ubuntu server disk if you haven’t already, and save it into a location on the Hyper-V server. Choose the “Install an OS from a boot CD/DVD” option, select “Image file (.iso)” and then browse to the file. Press next once the file is selected.
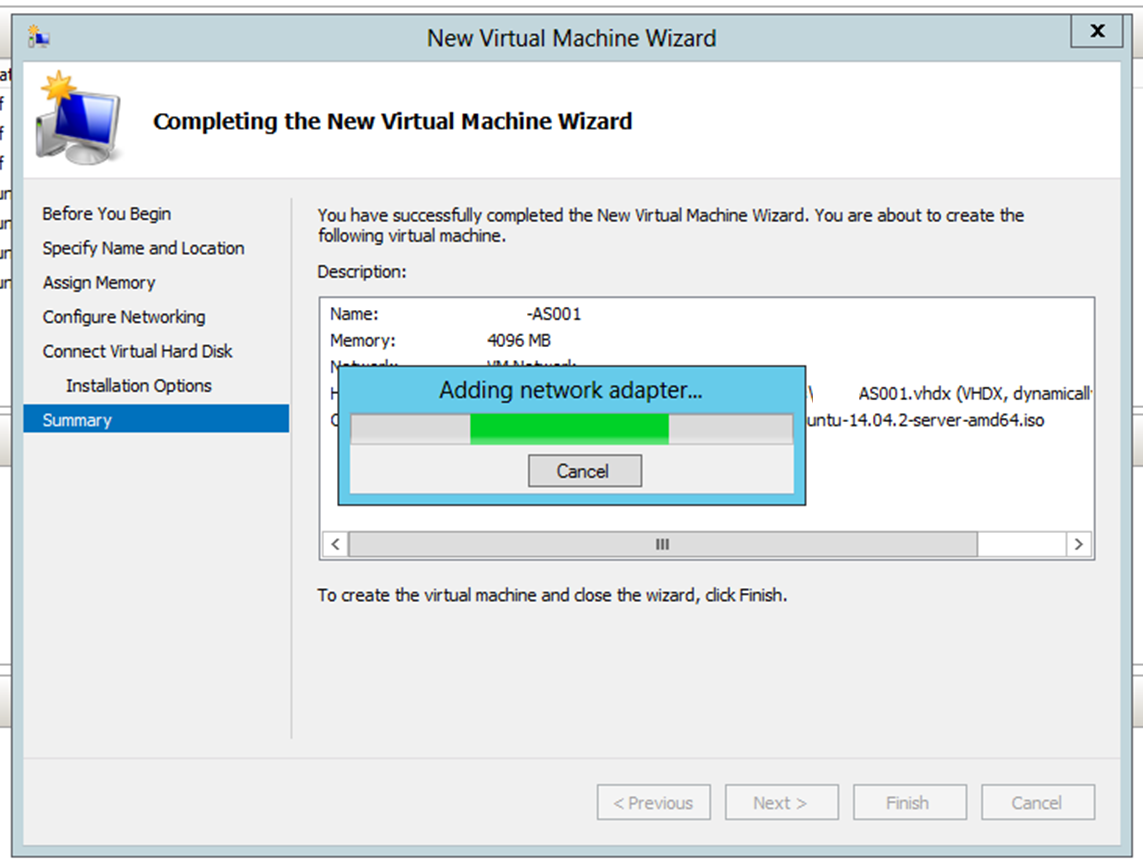
Check the summary information that you are presented with to make sure that you are happy with all of the options shown. Press Previous if you want to make any changes, or press Finish if you are ready to create the virtual machine.
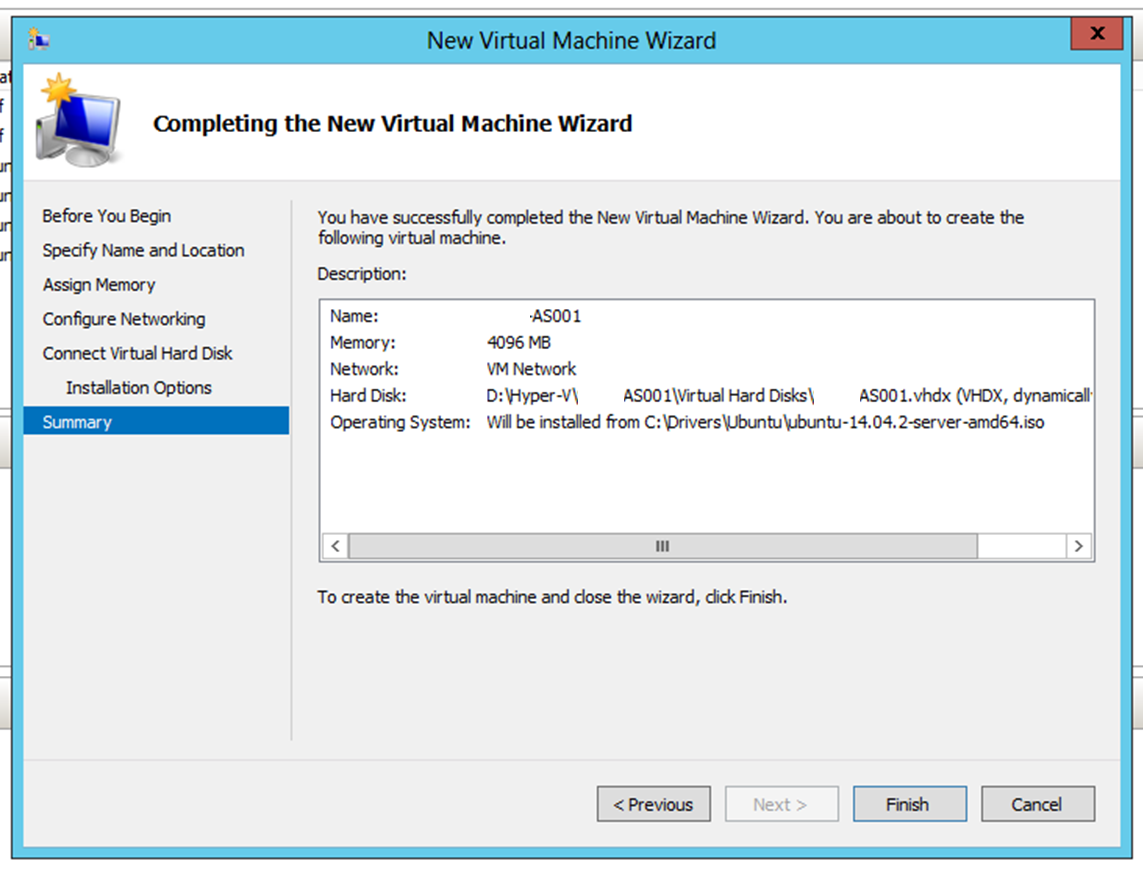
The wizard will then set about creating the virtual machine with the settings that you’ve told it to. This make take up to a minute, so just sit back and wait. You will then be asked if you want to start the virtual machine.
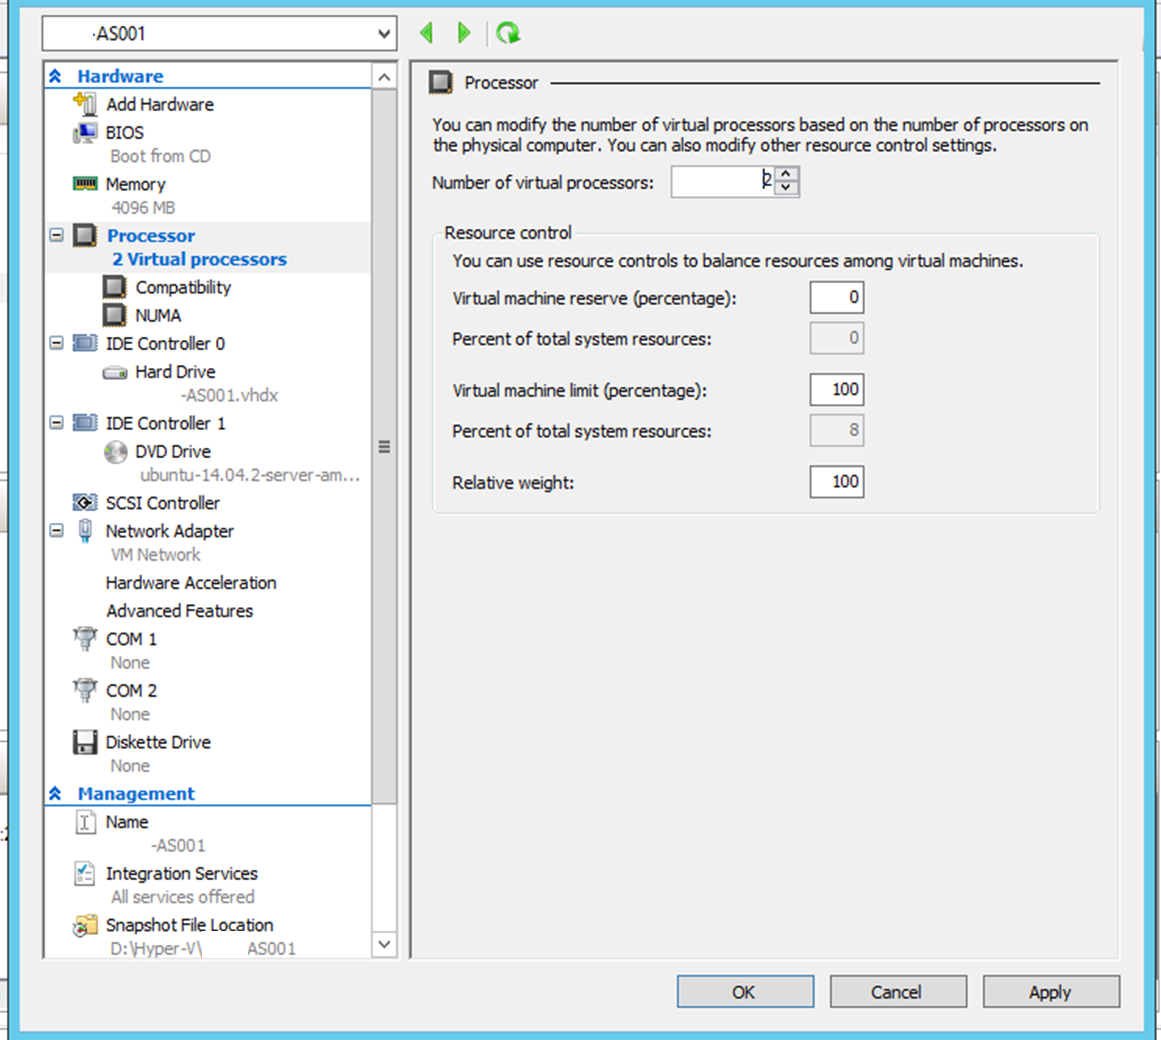
Optional: By default the virtual machine will only have one virtual processor available to it. You can increase this by right clicking on the name of the virtual machine and choosing settings. From the window that opens, click on the processor option from the left hand side and increase the number of virtual processors that are available. Once you’ve increased the number, press OK, then start the virtual machine.
If you’re only reading this guide to create a Hyper-V virtual machine, you’ve finished. Otherwise, you’ve still got a few more steps to go through. Sorry.